Extreme Car Audio, INC

197 S Union RD, Manteca, CA 95337 United States 209-665-4150
  • Home
  • Services
    • Car Audio
    • Window Tint
    • Marine Audio
    • Remote Starters
    • Vehicle Security
    • Motorcycle Audio
    • Driver Safety
  • About Us
  • Location
  • Contact Us
  • Facebook
  • Instagram
  • YouTube

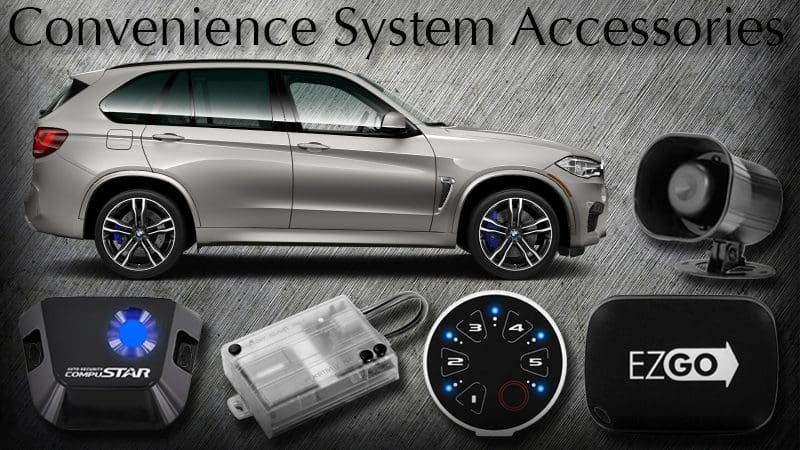
Convenience System Accessories

Convenience System Accessories

A remote starter, keyless entry or security system is a great way to enhance the functionality of your vehicle. A remote starter can make dealing with weather extremes much more comfortable. A properly installed security system can let you know if someone damages your vehicle or tries to steal it. If your car didn’t come with a remote control to unlock the doors, a keyless entry system can speed up the process of getting into your vehicle and locking it when you leave. An entire list of convenience options can be added to these systems to make them even more convenient and further improve the security of your vehicle.

Cellular Interface

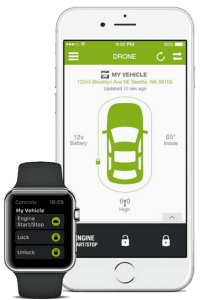
ConvenienceMany companies sell smartphone interfaces for remote start and security systems. These systems work by interfacing between an app on your smartphone and the convenience system in your vehicle. Yes, you have to pay for a monthly (or yearly) service plan, so don’t be surprised by that aspect. These systems will allow you to lock and unlock your vehicle, start it remotely (if you have a remote starter installed), and pop the trunk if that is hooked up.

The best part is that if you have a security system, your phone will alert you with a message if your alarm goes off. Anywhere your car and your smartphone have access to a cellular connection, you can control the system.

Many smartphone interfaces include GPS receivers. Such a receiver can send the longitude and latitude of your vehicle to the app on your smartphone. This information will let you know exactly where your vehicle is and how fast it is traveling. The app also can let you know right away if the vehicle moves when it’s not supposed to.

Some of these systems include the ability to monitor battery voltage, advise you of vehicle diagnostic codes and tell you the temperature of the vehicle interior. A few of these systems include a built-in backup battery and will alert you if the unit is disconnected.

Power Window Control Interfaces

One of the “classic” convenience accessories is the power window interface. This module lets your convenience system roll your windows up and down with the press of a button on your remote. The system can be programmed to roll the windows up when the doors are locked. Many of these window control systems have the option of venting a window an inch or two with a short press of the button on your remote, then rolling the window down completely when you hold the button for a second or two.

Power window modules also can be used to control sliding doors or sun roofs.

Tilt and Motion Sensors

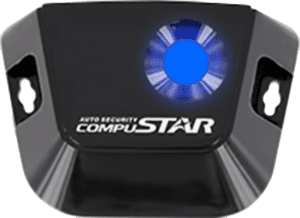
ConvenienceIf you are worried about someone stealing your wheels or towing your vehicle, then a tilt and motion sensor would be a great addition. These sensors calibrate themselves each time the alarm is armed, then trigger the system when the vehicle angle changes by more than a couple degrees. These sensors should not trigger the alarm under normal wind conditions, thanks to integrated software that recognizes when the vehicle is rocking.

Backup Battery Siren

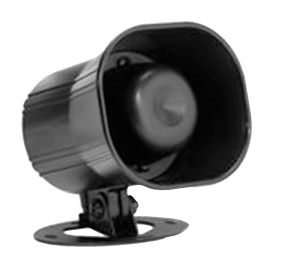
If you are concerned about someone cutting you the wire to your siren so they can work on bypassing the rest of a security system, ask your mobile electronics retailer about a battery backup siren. These sirens will go off if someone cuts the wiring to it. A key on the siren will turn it off.

Radar Sensors Boost Protection

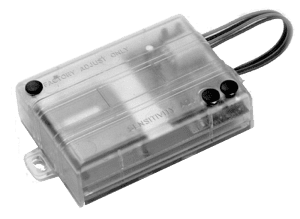
If you have a convertible-top vehicle or like to leave your windows down, a radar or field disturbance sensor is a great way to keep your vehicle protected. These sensors Convenienceusually have two stages of protection. The first will provide a warning to an intruder when something or someone enters the field. The second triggers the alarm right away. Your installer can fine-tune the size of the fields for a given sensor mounting location and vehicle type.

Keypads Add Convenience

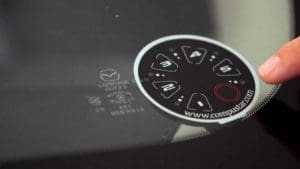
Several companies offer convenience keypads that attach to the inside of your windshield. You can type in a code of your choice to arm or Conveniencedisarm the system.

Some keypads have the option of acting as a pager for an owner who has a two-way remote or smartphone interface. These systems use technology similar to what a smartphone uses with a glass screen uses to detect your finger presses.

Proximity Remote

Many new cars have proximity keys that unlock the doors when you walk up to the vehicle. Your installer can add similar technology to an aftermarket keyless entry system. You simply keep a fob in your pocket. When you walk up to the vehicle, it will disarm the alarm without your having to press a button.

High-output Sirens

ConvenienceIf you want to get people’s attention when your alarm goes off, then the addition of a high-output siren is just for you. Some of these sirens are extremely loud, while others offer a sound that is truly ear-piercing! These high-frequency sirens are often called pain generators and are typically installed in the vehicle.

Protecting your vehicle from theft or vandalism is an art. Some installers take great pride in their security system installations. They conceal wiring in the dash very carefully and use wire protection that matches the factory look and feel. Split-loom, flexible-conduit, Tesa tape and vinyl tape are just some of the wire protection options. Installers route wires with factory wiring to further conceal their work.

Adding features and functionality to a security or convenience system is a great way to enhance its performance and usefulness. These are just a few of the possible additions available. Be sure to ask your local mobile electronics specialist retailer about the options they have available.

This article is written and produced by the team at www.BestCarAudio.com. Reproduction or use of any kind is prohibited without the express written permission of 1sixty8 media.
Filed Under: RESOURCE LIBRARY, ARTICLES, Remote Car Starters

Why Would I Want A Remote Starter?

Remote StarterIf you have never owned a remote starter, you might be asking yourself why they are so popular. The mobile electronics industry switches into “starter season” each fall and, when the weather cooperates, doesn’t stop until spring time. But what is it about having a remote starter that is so great? We’ll explain.

Just What Is a Remote Starter?

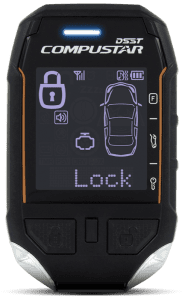
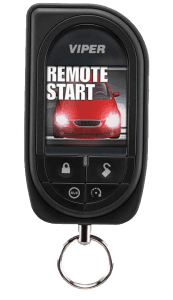
A remote starter system includes several components: a primary system “brain” and interface module, an antenna and at least one remote control. The installer will wire the brain into the ignition system of your vehicle, and then the brain replicates the electrical connections or data commands that are used to start your vehicle. When you press the Start button on the included remote control, the brain starts the remote start process. Pressing the Start button again or letting the preset timer run out will stop the car.

What Are the Benefits of a Remote Starter?

The biggest advantage of having a remote starter is that it will give your vehicle and its systems a head start in getting up to operating temperature. While most people think of a remote starter as something that is used exclusively in the middle of winter, many systems in the vehicle are involved.

Remote StarterThe engine has two fluid systems that need a chance to warm up before the vehicle is driven: the cooling and lubrication systems. As your engine runs, both the coolant and the oil will warm up. Engines operate their best at their operating temperature. At these temperatures, the oil flows easily through the engine and properly lubricates everything from the crankshaft and camshaft bearings to the cylinder walls and upper valvetrain. Oil gets thick when it’s cold, so warming it up before you put a heavy load on it (such as accelerating away from being parked or at a stoplight) makes it flow more easily.

The engine’s cooling system has to warm up for the heater core under the dash of your car to warm up. Only once the heater core is warm can the interior of the vehicle start to warm up in the winter.

In the summer, your engine needs to be running for the air conditioning compressor to work and allow it to extract heat from the interior of your vehicle. Even in the summer, your engine oil needs a few minutes to warm up so it can protect your engine properly.

How Long Should My Remote Starter Run?

You want the remote starter system to give your car a head start at warming up. Running the engine for 30 minutes would waste a lot of fuel. Most starters have a default run-time of 10 to 12 minutes. If you start the car 5 to 10 minutes before you want to leave, it will have had a good chance to warm up and start making the interior comfortable.

What Else Can My Remote Starter Do?

Remote StarterIn many vehicles, especially those with computers that control the accessory circuits, you have many options that can enhance the functionality of your remote starter. The most common option is door lock control. Most starters have multiple buttons on the remote control that will allow you to unlock the doors as you approach the vehicle, then lock them again as you walk away after arriving at your destination.

Some starter systems have the option of adding a security system. This upgrade adds a siren, shock sensor and additional wiring to monitor the doors. Other options include controls for the power trunk/tailgate, rear window defroster, heated seat and even power window. Your retailer can help guide you through the specific options for your vehicle.

Is My Car Safe When Remote Started?

Remote StarterA lot of retailers are asked whether someone could just walk up the car once it is remote started, open the door, get in and drive away. The answer is no. Stealing your car while it is remote started is no easier than when it’s parked and turned off.

First, most starters keep the doors locked after starting the car. It would be no easier to get in than when the vehicle isn’t running. For vehicles with automatic transmissions, you almost always have to put your foot on the brake pedal to shift out of park. Most remote starters have a shutdown wire connected to the brake pedal – unless you have put the key in the ignition, the vehicle will shut down as soon as you put your foot on the brake. You have no fear of anyone taking your vehicle just because you are using a remote starter system.

Does the Brand of Remote Starter Matter?

That’s a tough one. Certain brands have excellent reputations for reliability. In most cases, the brand of starters that a store carries is typically the one that they have the most experience with and confidence in installing. No installer wants to troubleshoot faulty equipment, so good retailers will always work with brands they trust.

Being familiar with the brand also means that the installers know the color and function of all the wires coming out of the brain so they spend little or no time is spent on reading the owner’s manual. Installers will also have all the tools required to program the system to your vehicle. Most remote starters in late-model vehicles have to communicate with CAN data network, so proper programming and configuration are essential.

What Else Do I Need to Know about a Remote Starter?

You have a lot of options when it comes to purchasing a remote starter. Other than the accessory circuits we mentioned earlier, the options involve different ways of controlling the starter system.

  • Remote StarterYour first option will involve deciding how much range you need. The range is the distance (in feet or miles) that you will be away from the vehicle and still want it to start when you press the button on the remote control.
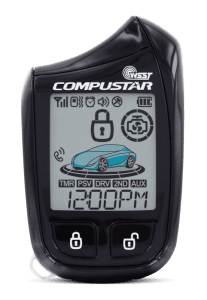
  • The second option is how you want to communicate with the remote starter. Are you happy to push the Start button and let the vehicle do its thing? This type of communication is called one-way. The other option is a two-way remote that will blink, beep or vibrate once the system has received a command back from the vehicle to confirm it has started successfully.
  • You can also incorporate cellular-based smartphone interfaces with your starter. With a smartphone interface, as long as your phone and the vehicle can get a cellular data connection, you can be anywhere on the planet and start your car.

Choose Your Retailer Wisely

You also need to ask the retailer how the system will be installed. Installers around the country, and around the world, use many different concepts and methods. Some focus on speed so they can offer low prices. Other installers focus on replication of OEM methods for connectivity and wire management. What matters is that the system is reliable. Wire connections should be secure both mechanically and electrically. The installer should mount components so they do not cause buzzes or rattles. The shop should pay special attention to the safe disassembly and reassembly of your vehicle’s trim panels.

We can’t describe every situation, so ask to see their work and judge for yourself.

Owning a remote starter is a great way to save a few minutes each day. Giving your car even 90 seconds to warm up and get the fluids flowing before you start to drive can have a dramatically positive effect on the longevity of your vehicle and on your comfort.

Remote starter systems are not just for cold climates, so visit your local mobile electronic specialist retailer and see what they have to offer.

This article is written and produced by the team at www.BestCarAudio.com. Reproduction or use of any kind is prohibited without the express written permission of 1sixty8 media.
Filed Under: RESOURCE LIBRARY, ARTICLES, Remote Car Starters

Product Spotlight: iDatalink Maestro AR Multi-Amp Upgrades

Maestro AR

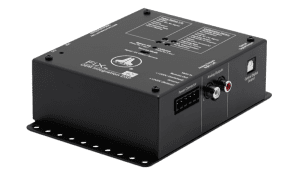
Several years ago, iDatalink, the company known for its class-leading remote car starter interfaces, launched an amplifier integration solution called the Maestro AR. The AR (which is short for amplifier replacement) was designed to interpret the CAN bus commands intended for a factory amplifier into something a third-party digital signal processor can understand. While DSP-equipped products from several companies work with the Maestro AR, iDatalink took advantage of a feature in the ARC Audio PRO Series line of processors to develop a unique solution. Multiple AR units can be installed in a single vehicle to control multiple digital signal processors or DSP-equipped amplifiers at the same time. Let’s examine how these upgrades work and why you’d want this solution in your vehicle.

How Does the Maestro AR Work?

In most vehicles with CAN bus-controlled factory-installed amplifiers, the radio’s audio output is a fixed-amplitude (volume) stereo signal. To be clear, the analog audio signal from the source unit, be it the FM radio, Bluetooth streaming or playback of a digital audio file, does not change level with the volume control on the radio. This limitation means that if your installer connects an amp to this signal, it will always be at full volume, no matter where the volume on the radio is set. In some vehicles, there is also a digital audio signal connection between the source unit and the amplifier. The Maestro AR will convert these to an analog signal.

Along with the audio signal coming from the radio are commands that travel along the CAN bus. These commands include volume adjustments, signal routing changes for Bluetooth hands-free calling, warning chimes and tone controls and adjustments to features like bass, midrange and treble tone controls, surround sound modes or speed-compensated volume adjustment. In many vehicles, a second analog signal from the radio caries navigation prompts and hands-free Bluetooth call audio.

The digital signal processor in the factory-installed amplifier routes the stereo audio signal to the various speakers in the vehicle after applying whatever filtering, equalization or up-mixing the manufacturer requested. The Maestro AR interprets commands on the CAN bus network and feeds them to the third-party DSP to ensure that warning prompts and Bluetooth signals are mixed into the system and routed as needed. Finally, and most importantly, the digital messages on the CAN bus control the output level of the third-party DSP in the amplifier to act as the master volume control.

Maestro AR
The radio in the dash of many vehicles sends digital commands to a DSP-equipped amplifier to process the stereo audio signal.

In the above diagram, you can see three connections from the source unit to the amplifier. Those are the fixed-level audio, the analog Bluetooth/prompt signal and the CAN network connection.

In a vehicle that uses the Maestro AR, those control commands go to a third-party DSP from companies like ARC Audio, Audison or Rockford Fosgate. These processors can then replicate the majority of the functions of the DSP in the factory amplifier to give you complete control over your audio system.

In a typical upgrade, your installer would program the Maestro AR interface for your vehicle’s year, make, model and trim level, then connect it to the wiring in the car with a T-harness that’s also available from iDatalink. All third-party partner DSP companies require the technician working on your vehicle to install a brand-specific adapter harness to work with the Maestro T-harness.

For this article, we’ll talk about an upgrade that uses ARC Audio DSP-equipped amplifiers. This ARC Audio DSP installation requires an input adapter harness called the IDATA-OEM, which would be available from your ARC Audio retailer. The IDATA-OEM harness connects to the iDatalink T-harness and the analog RCA inputs on any ARC Audio amplifier or DSP that uses the PS8-Pro platform (PS8 Pro, IPS8.8, PS8-50, Blackbird or PSM Pro). The T-harness includes speaker wires that your installer would connect to the output of the new amplifier to make it easy to feed audio signals to the speakers. Finally, your installer would configure the DSP’s output channel assignments (front left, front right, rear left, rear right, center and subwoofer), crossovers, equalization and, if applicable, delays for each speaker to make the new system sound great.

Maestro AR
An example of an audio system that includes a Maestro-AR compatible DSP-equipped amplifier.

ARC Audio Multiple Amplifier Systems

Many years ago, ARC Audio added a feature to its PS8-Pro and newer digital signal processors that allows several processors to be connected simultaneously to a computer via unique and individualized electronic product IDs for every signal processor made. The installer can label each processor, and the technician setting up the system can select which processor (or DSP-equipped amplifier) they want to adjust from a pull-down menu. While the product development team at ARC Audio was working with iDatalink on Maestro compatibility, the two companies realized they could use this feature to allow multiple AR modules to work together simultaneously to control multiple stand-alone DSPs or DSP-equipped amplifiers.

Maestro AR
The PS8-Pro and new DNA software allow your installer to connect to multiple DSPs simultaneously.

Why would someone want multiple amplifiers in their car’s audio system? We’ll use the example of Fred Lynch’s Ford Flex. Fred works at ARC Audio, and one of his many duties is to oversee international sales. He recently drove his Flex from Modesto, California, to Toronto to be displayed and auditioned at the CMA Expo in March 2023. The audio system in the Ford Flex has three ARC Audio Blackbird 12-channel DSP amplifiers and an additional ARC 1000.2 amp that powers a trio of A-Series shallow-mount subwoofers. In addition, three Maestro AR processors in the vehicle individually control each of the system’s three DSPs.

Fred built the sound system in his Flex to demonstrate the capabilities of ARC Audio’s amplifiers, processors, speakers and subwoofers in an OEM application with all OEM controls and features retained. Most importantly to his family, no storage space was lost. As such, he optimized the system with as much power as possible. He’s also upgraded the vehicle with a three-way front stage with 8-inch woofers in the doors and RS-3.0 3-inch midrange speakers, and RS 1.0 tweeters in the A-pillars. He also bi-amped the rear ARC-Series, coaxial speakers in the mid doors and rear D-Pillar speakers! The center channel midrange and tweeter are also filtered actively. A pair of preamp DSP outputs on one of the Blackbird amplifiers provides the signal to the ARC 1000.2 subwoofer amplifier.

Bonus Features of Maestro Integration

We mentioned earlier that the AR interface sends more than just volume control commands from the factory radio to the amplifiers or signal processors. The ARC Audio DNA software allows your installer to set up a dedicated equalizer band that works with the midrange control and a high-shelf filter that responds to the treble tone controls on the radio. The bass EQ control on the radio can be configured to adjust a single-band EQ, a shelf filter or the remote level control for the subwoofer output.

Finally, the Surround Mode control on the factory radio allows for selecting from several DSP configuration presets. It’s worth noting that the number of presets is limited by the interface on each vehicle’s radio. In Fred’s Flex, he has a configuration with just the front-stage speakers only. The second preset adds the subwoofers. The third preset adds the side and rear speakers. This third preset configuration added space and size to the experience without degrading the tightly focused front stage. The fourth preset changes from a sound-quality-oriented configuration to something more popular with enthusiasts who like a lot of bass by raising several crossover points so the system can safely use the amplifiers’ prodigious power. Toggling the “speed-compensated volume” selection from off to Low to Medium or High switches the presets on all three amplifier DSPs simultaneously.

Another unique feature of the Maestro AR system when using the ARC Audio Pro-Series DSP-equipped product is that installers can reconfigure the volume structure and incremental step level on the factory volume knob. For example, many factory-installed audio systems have issues where the volume control’s first step results in sound that can be too loud to converse with the person in the seat next to you. Another common problem is that the system reaches its maximum output capabilities using half of the volume steps on the factory radio. With AR and an ARC Audio processor, your installer can redefine the volume steps so the volume control works like a factory system with the range and incremental steps you expect.

Maestro AR
Commands from the midrange and treble controls on the factory-installed radio adjust the midrange and treble tone controls as configured by the ARC Audio DNA software.
Maestro AR
ARC Audio’s DNA software allows your installer to set minimum and maximum volume levels to ensure that the system doesn’t distort.

Why Use the Maestro AR?

Any audio system upgrade ideally aims to deliver improved sound quality, extended frequency response and output capability while maintaining the system’s ease of use. Upgrading the system with better speakers, subwoofers, high-power amplifiers and client-specific system calibration while retaining the intuitive control and appearance of the factory radio using the iDatalink Maestro AR ensures that the results are going to be predictable and reliable. Furthermore, this solution eliminates the need for the installer to attempt to recombine filtered, equalized and delayed signals; worry about Bluetooth hands-free calling echoes; or add an external volume control. In short, everything works intuitively and sounds excellent.

So if you have a Ford, Chrysler, Dodge, Jeep, Ram, Toyota, Lexus, Subaru, Volkswagen or Mitsubishi, or a Harley-Davidson motorcycle, visit a local authorized vehicle iDatalink Maestro Retailer and ask about an audio system upgrade that uses the iDatalink Maestro AR interface. As a bit of teaser, we have it on good authority that iDatalink is working on an interface solution for vehicles that use A2B communication, digital over the copper (as is found in many Hyundai and Kia vehicles), along with MOST 50- and MOST 125-equipped vehicles. With the Maestro AR solutions, owners of these vehicles will be able to upgrade the sound systems with premium signal processing, amplification and speakers, ensuring that music enthusiasts can continue to have audio systems that are enjoyable and easy to use.

This article is written and produced by the team at www.BestCarAudio.com. Reproduction or use of any kind is prohibited without the express written permission of 1sixty8 media.
Filed Under: RESOURCE LIBRARY, ARTICLES, Car Audio, PRODUCTS Tagged With: ARC Audio, iDatalink

Vehicle Lighting Upgrades Offer Many Options

LightingWhen it comes to driving in the dark, the quality and quantity of lighting you have is paramount to your safety, and the safety of those around you. In recent years, automakers have begun to put significant effort into their lighting systems. From the days of incandescent lighting to upgrades with halogen gases, high-intensity discharge (HID), light-emitting diodes (LEDs) and – most recently – lasers, lighting has come a long way. The aftermarket is evolving quickly as well, so let’s look at some of the options that can make your nighttime drive safer.

Light Source Options

Factory headlight replacement options are the most popular upgrades available. There are three basic options: incandescent, LED and HID. Incandescent bulbs use a high-temperature filament that glows white-hot when current passes through it. Advances in materials and the selection of gases that are used in the construction of the light bulb have improved efficiency and longevity, as well as increased light output. A few years ago, tinted incandescent bulbs were popular – they gave the white/blue appearance of high-dollar HID kits. However, any time you put something between the light source and what you are trying to illuminate, you decrease the light output. Cool? Yes. Bright? Not so much.

LightingThe latest rage is LED lights. Vehicles like the Toyota Corolla, Acura MDX and new Honda Civic are available with LED headlights. These light sources are very bright. They produce full output very quickly when turned on. In the aftermarket, LED replacement headlight bulbs are becoming more and more popular. The quality of LEDs available is increasing in tandem with demand. However, the light output (measured in lumens) is still a little behind that of HID bulbs. LED lights often cost more, because not as many are being produced – a supply-and-demand issue. LED lights also require external cooling. Aluminum heat sinks, braided metal tabs and fans are common solutions for helping to dissipate the heat generated by LEDs. These can pose challenges regarding installation and available space.

The 1996 Lincoln Mark VIII is credited as being the first production vehicle with HID headlights. This system works by increasing the 12V vehicle electrical system voltage up to around 100 volts. This voltage goes to a pair of electrodes in a gas-filled chamber. A steady spark between the two electrodes is what produces the light. However, it takes around 25,000 volts to get the lights to start working. That’s why you get a small, bright flash when you first turn on an HID system. HID lights are among the brightest on the market. The color of the light they produce is closer to that of sunlight, with more blue content than with incandescent bulbs.

Light Color

Lighting
Image courtesy of Vleds.com

We should talk about light color, or more accurately, light temperature is rated on the Kelvin scale. Lower numbers, around 3,500–4,500 K have significant yellow and orange content, and are similar to incandescent bulbs. Moving up the scale, 4,500–6,000 K is bluer and closer to sunlight. That said, as the blue content increases, so can the propensity for eye fatigue – blue light can be tiring to look at. You don’t want to go too high for daily use. Bulbs rated at 6,000–10,000 K are for appearance purposes only. The light becomes more purple toward the high-end of the spectrum. These are fine for a show car, but not practical or safe for daily use.

Light Intensity

Many people believe there is a direct correlation between color temperature and light output. That depends, of course, on the manufacturer of the bulb. The thinking is that lower temperatures produce more light output. Ultimately, the amount of light that is produced will determine how much and how far you can see.

Light output is measured in lumens. More lumens means more brightness, which, for a given beam pattern, means that the road will be illuminated better.

Beam Pattern

LightingWhen upgrading your headlights, it is critically important that you are conscious of the resulting beam pattern. The light that is emitted from the front your vehicle is in a specific pattern – not round like a flashlight. The beam has a flat line through it, ever so slightly below horizontal. This allows the light to illuminate the road without blinding oncoming drivers. The light should also be brighter near the edge of this cutoff, putting more light down the road rather than in front of the vehicle. Too much light in the foreground will cause your pupils to close slightly, reducing how far down the road you can see.

Likewise – and this is a great night driving tip – the brightness of the vehicle interior can have the same effect. Keep the dash and radio illumination as dim as possible. That can help you see further down the road.

If the new light bulbs you install change the beam pattern, remove them. They are not compatible with your headlights, and they will blind oncoming drivers. This is extremely dangerous and can cause accidents.

Headlight Styles

There are two types of factory headlight assemblies in use today: reflector style and projector style.

The projectors are fairly easy to recognize – they have smallish, 2–3” round lenses. Reflectors have a large, molded, mirror-finish bowl behind the light. While one is not necessarily better than the other, you do need to know which you have when you go shopping for upgrades. Aftermarket HID kits don’t typically work properly in reflector-style headlight assemblies. The beam pattern becomes uncontrolled, pointing light into the eyes of oncoming drivers. In many cases, depending on the specific design of the kit you choose, you can use an LED upgrade in those applications.

In projector-style systems, the shape of the internal reflector is designed to work with either incandescent or HID style bulbs. The position and shape of the light source differs between these two bulb types. You can often get away with putting HID bulb kits in a projector designed for Incandescent bulbs without any detrimental effects, but they may not be quite as bright or focused as an HID bulb in a projector designed specifically for that application.

Retrofits

If you are looking for the ultimate lighting upgrade, you may want to contact your local mobile electronics specialist about a retrofit. A retrofit involves removing the headlights from the vehicle, taking them apart, and installing new projectors with OEM-quality bulbs and ballasts. Most of these solutions use what is known as a bi-xenon projector. These projector assemblies have motorized shutters that move to produce a “high beam” light pattern. The output of these systems is among the best there is – perfect beam pattern, excellent cutoff and great light output. Some headlights are easier to work on than others, so contact a local specialist for details about your lights.

You can also make some cosmetic changes while the lights are apart. The installation of LED halo rings, and painting some of the interior components can have a dramatic effect on the look of the vehicle.

Wiring

LightingWhen you want to change headlights, wiring is often involved. Many new vehicles have systems in place to detect when a bulb is burnt out. They can also modulate the voltage to high-beam lighting circuits to operate them as daytime running lights.

When it comes to wiring, nobody is better than your local car audio specialist retailer. Work with them to ensure that your new light wiring can provide enough current and operates the way it should. Relays, capacitors and load resistors may be required to achieve the results you want. Don’t ever skimp on wiring – it affects the reliability of the lights you install, and your safety is at risk.

A Word of Caution About Vehicle Lighting Upgrades

We want to remind you that your headlights are a tool. They are not toys, and their performance and reliability are of the utmost importance to your safety and the safety of those you share the road with. Lighting upgrades are a great way to improve your safety at night. Drop by your local mobile electronics specialist and discuss your options.

This article is written and produced by the team at www.BestCarAudio.com. Reproduction or use of any kind is prohibited without the express written permission of 1sixty8 media.
Filed Under: RESOURCE LIBRARY, ARTICLES, Lighting

Subwoofer Enclosures, More Than Just a Box

Subwoofer EnclosuresFor decades, there has been discussion after discussion about which of the different subwoofer enclosures are “the best” and why. Let’s take a look at why we need a subwoofer enclosure at all, and how the three popular styles – sealed, vented and bandpass – differ in their design and performance.

Back-Wave Management

If you were to hook any speaker up to an amplifier, hold it in your hand and play music into it, you would find that you don’t hear any bass. That is because the sound coming from the front of the speaker cancels out the sound coming from the back. We need a way to keep the sound coming from the back of the speaker cone from interfering with the sound coming from the front. If you were to cut a hole in the middle of a large, flat piece of wood and mount the speaker in it, you would hear a lot more bass. In fact, until the half-wavelength of the bass frequencies becomes longer than the dimensions of the piece of wood, you will get really good, solid bass. If we put a speaker in an airtight enclosure, none of the sound coming from the back interferes with the sound coming from the front.

Power Handling

Subwoofer Enclosures
Different parts of the subwoofer determine its excursion and power handling.

The ability of a speaker to use the power produced by an amplifier is limited by two criteria – how far the speaker cone can move and how much heat the voice coil of the speaker can handle. Thermal power-handling limitations are based primarily on the design of a speaker – the size of the voice coil, how airflow is managed around the voice coil and the proximity of the stationary components of the motor assembly to the voice coil are the key contributing factors. The excursion-limited constraints are also part of the speaker’s design – how long the voice coil winding is, how tall the top plate is and how much suspension travel is available are the key factors.

Excursion

When it comes to reproducing bass, a speaker has to move four times as far each time the input frequency is halved. For example, a speaker moving 0.125 inches at 100 Hz has to move 0.5 inches to reproduce the same output level at 50 Hz and 2 inches at 20 Hz. You can see that, for the lowest of frequencies, cone excursion limitations are significant – very few speakers can move 2 inches without significant distortion.

When we put a speaker in an enclosure, the combination of the enclosure and the speaker create a high-pass filter. We are effectively decreasing the low-frequency output of the speaker. Why would we want to do this? The benefit of an enclosure is that we can control the motion of the speaker cone. Looking at a simple acoustic suspension (also known as a sealed) enclosure will be the simplest illustration of this explanation.

Compliance

Each and every speaker – from the biggest of subwoofers to the smallest of tweeters – has a springiness to the cone. We call this the compliance. We measure compliance by comparing it to a volume of air with the equivalent springiness. We call this characteristic of the speaker Vas. In general terms, a speaker with a very small Vas specification has a tight suspension, and a speaker with a large Vas has a softer suspension. There is a lot more to it than that, but for the discussion of enclosure features and benefits, that’s all we need to get into for now.

Subwoofer EnclosuresWhen we put a speaker in an enclosure, we stiffen the suspension. When you push in on the speaker cone, you are pushing against the speaker’s suspension (which wants to center the cone) and you are trying to pressurize the air in the enclosure. When the cone tries to move outward from rest, you are putting the air in the into a vacuum state – it wants to pull the cone back to its resting position. We do sacrifice low-frequency output, but we gain significant power handling and control over the motion of the speaker cone. For the latter, the combination of the air in the enclosure and the speaker suspension helps to stop the speaker cone from moving once an electrical signal starts it in motion.

Think of it like a shock absorber on a vehicle. You can see that having an enclosure is critical.

Acoustic Suspension Subwoofer Enclosures

The simplest of enclosures is called an acoustic suspension or sealed enclosure. In these enclosures, we are putting the speaker into an airtight box. When we put a speaker in an enclosure, the system resonates at a specific frequency that – we call this Fc. Below that frequency, the output is reduced at a rate of -12 dB per octave. If the system has a resonant frequency of 50 Hz, the output will be 12 dB quieter at 25 Hz.

Subwoofer Enclosures
Here we see the smooth response of the sealed enclosure.

Acoustic suspension enclosures are amongst the smallest of the different enclosures we will discuss. They are also the easiest to construct, and most forgiving regarding calculation error. If you combine the roll-off of the enclosure and speaker system with the increase in efficiency you get from the relatively small air volume of the vehicle interior (often called transfer function or cabin gain), you can get a very flat in-car response with good infrasonic output. Bass from an acoustic suspension enclosure is very tight and controlled, thanks to excellent transient response.

There is a down side. If you are looking for loud bass, then you need a driver that has a lot of excursion capability, and you need a reasonable amount of power to move the speaker cone back and forth to get the level of output you want. There is another drawback that isn’t talked about as much, and that is distortion. As a speaker increases in excursion, the amount of distortion it creates increases. Likewise, distortion increases near the resonant frequency of the speaker. So, what can you do?

Bass Reflex Subwoofer Enclosures

A bass reflex (also known as ported or vented) enclosure uses a vent to increase low-frequency output by making use of the speakers back-wave energy. The vent, often a round tube or sometimes a rectangular slot, has an area and a length. The specific area and length of the vent and their relationship to the total volume of the enclosure cause the column of air in the vent to resonate at a specific frequency when excited by the speaker. We typically tune bass reflex enclosures quite low to emphasize the bottom octave or so of the audible frequency range. They can be tuned higher to increase efficiency for high-SPL applications. There is always a sacrifice, though – when we tune the enclosure higher, we sacrifice low-frequency performance.

Bass reflex enclosures are typically larger than sealed enclosures. There is no hard-and-fast rule to associate with the size relationship, but 25–50% large is common. The trade-off for that extra volume is two-fold – more efficiency in the tuning frequency and more power handling, at some frequencies.

When the subwoofer used in a bass-reflex subwoofer enclosure produces frequencies around the resonant frequency of the vent/enclosure combination, the driver excursion is reduced to almost nothing and all the “work” is done by the vent. Put more succinctly, around the tuning frequency, most of the music is being produced by the vent. The benefit to this is that power-handling problems caused by cone excursion limitations are dramatically increased. Since the cone is barely moving, very high sound pressure levels can be achieved. Around the tuning frequency, power handling is limited by the thermal capabilities of the subwoofer.

As we mentioned earlier, one factor that contributes to loudspeaker distortion is cone excursion. With a bass reflex enclosure, the driver moves significantly less than with an acoustic suspension enclosure design. As long as the vent itself has enough area and a smooth transition at both openings, the distortion produced by a properly designed bass reflex enclosure can be impressively small.

Subwoofer Enclosures
Notice the rapid dropoff of the low end response (on the left) of this vented enclosure graph.

Nothing is free, is it? A factor in deciding to use a bass reflex design is how fast the output decreases below the tuning frequency. Where an acoustic suspension enclosure rolls off at -12 dB per octave, a bass reflex enclosure rolls off at 24 dB per octave. Below the tuning frequency, the vent acts more and more like a hole in the enclosure, offering increasingly less back pressure as frequency decreases. Designing for, and managing, driver excursion is a fundamental part of bass reflex enclosure design.

Bandpass Subwoofer Enclosures

We will quickly touch on bandpass enclosures to wrap up this article. There are several different designs for bandpass enclosures. Some use a sealed enclosure, and some a vented one. Independent of whether the rear chamber is sealed or vented, the output of the subwoofer plays into a vented enclosure. This enclosure acts as a low-pass filter. Why would we want to design a bandpass enclosure?

Subwoofer Enclosures
The reason for the name “bandpass” is easy to see when one looks at the response curve of the bandpass enclosure.

First and foremost, all of the output of the enclosure is produced by the vent or vents. This allows a creative designer to build an enclosure in the trunk of a vehicle and have the vent opening play through the rear parcel shelf. There have been some amazing bandpass enclosures build in the front storage area of mid- or rear-engine vehicles. The vent allows the bass to enter the interior of the vehicle. Bandpass enclosures can also offer impressive gains in efficiency over acoustic suspension and bass reflex enclosures, but they do so at the sacrifice of bandwidth and enclosure volume.

A bandpass enclosure has two resonant frequencies – one for each of the enclosures. The resultant management of cone excursion can allow a great deal of bass to be produced from limited excursion drivers. While the speaker cone itself does not move a great deal, the amount of work done by the motor assembly is still significant. You are still putting power into the speaker, and work is being done. Because the front chamber of the enclosure acts as a filter, it can also be very difficult to hear when the speaker is distorting.

Regarding the complexity of design, and forgiveness of construction error, bandpass enclosures are the most complicated to execute perfectly. Unlike an acoustic suspension or bass-reflex design, bandpass enclosure designs must be tailored exactly to the speaker they are being used with. Never trust the concept of a “generic” bandpass enclosure.

Lastly, because a bandpass enclosure includes an acoustic low-pass filter, it has to be used with good-quality, appropriately sized midbass drivers. If not, the bass can sound lost or disconnected relative to the rest of the music.

For More Details On Subwoofer Enclosures, Visit Your Local Specialist

As you can see, there are many ways to install a subwoofer – or any speaker, for that matter. Navigating the available space in the vehicle, as well as different speaker sizes and designs, can be tricky. The design and construction of an enclosure can be complex, especially when complex shapes are involved. Visit your local car audio specialist retailer to explore different enclosure options for your vehicle.

This article is written and produced by the team at www.BestCarAudio.com. Reproduction or use of any kind is prohibited without the express written permission of 1sixty8 media.

Filed Under: Car Audio, ARTICLES, RESOURCE LIBRARY

  • « Previous Page
  • 1
  • …
  • 16
  • 17
  • 18
  • 19
  • Next Page »

Recent Articles

A motorcycle audio amplifier

What to Look for in a Motorcycle Amplifier Upgrade

June 22, 2025 

It should come as no surprise that it takes a moderate amount of amplifier power to reproduce music on a motorcycle that’s audible when on the freeway. So aside from great … [Read More...]

A purple car with tinted windows

Four Reasons to Have Your Car or Truck Windows Tinted

June 8, 2025 

A person might choose to have the windows on their car or truck tinted for a variety of reasons. No matter why you’re interested in window tint, the team here at BestCarAudio.com … [Read More...]

DroneMobile XC Connected Dashcam Security System

Product Spotlight: DroneMobile XC Connected Dashcam Security System

May 26, 2025 

Thieves frequently target vehicles from Hyundai, Kia, Toyota, Lexus, RAM, Chevrolet, and Honda. These vehicles are often stolen for their parts or exported overseas. … [Read More...]

A man installing car window tint

Five Questions to Ask When Shopping for Automotive Window Tint

May 25, 2025 

Shopping for high-quality window tint for your car or truck isn’t much different from shopping for any other automotive accessory upgrade. There are high-performance tint films … [Read More...]

Compustar 2WG17 Remote Kit

Product Spotlight: Compustar 2WG17 Remote Kit

May 19, 2025 

Compustar was one of the first brands to allow consumers to choose a remote control package to accompany their remote start controller. Previously, we looked at flagship-level … [Read More...]

Subscribe!

Enter your email address to subscribe to our website and receive notifications of new posts by email.

Join 1 other subscriber

Testimonials

Our customers can trust us with a job done right.

If you want to upgrade your vehicle with window tint, a new car audio system or a remote car starter, we invite you to visit the team here at Extreme Car Audio in Manteca.

Check back here for more testimonials soon!

Whether it’s a new radio, a remote car starter or new driving lights, we take the time to ensure that every connection is secure and the equipment is mounted safely. We do the job right the first time, every time.

Window Tinting Experts!

We take a great deal of pride in our window tint solutions. Call or stop by today to see what options we can offer to take your vehicle to the next level.

Subscribe to Our Website

Enter your email address to subscribe to our website and receive notifications of new posts by email.

Location


Get Directions to Extreme Car Audio, INC

Address

Extreme Car Audio, INC

197 S Union RD, Manteca, CA 95337
209-665-4150

Connect With Us

  • Facebook
  • Instagram
  • Youtube

Services

  • Car Audio
  • Driver Safety
  • Marine Audio
  • Motorcycle Audio
  • Remote Starters
  • Vehicle Security
  • Window Tint

Hours

Monday, Tuesday, Wednesday, Thursday, Friday, Saturday8:30 am – 6:00 pm

We are Closed on Sunday

Copyright © 2025 Extreme Car Audio, INC · Privacy Policy · Website by 1sixty8 media · Log in


Loading Comments...