Extreme Car Audio, INC

197 S Union RD, Manteca, CA 95337 United States 209-665-4150
  • Home
  • Services
    • Car Audio
    • Window Tint
    • Marine Audio
    • Remote Starters
    • Vehicle Security
    • Motorcycle Audio
    • Driver Safety
  • About Us
  • Location
  • Contact Us
  • Facebook
  • Instagram
  • YouTube

Product Spotlight: Thinkware U1000 Plus Dash Camera

Thinkware U1000 Plus

If you are shopping for a premium dash camera with a high-resolution image sensor, the Thinkware U1000 Plus should be on your shortlist. This solution can record video in 4K resolution and is available with a secondary camera to capture what happens behind your vehicle. Let’s take a close look.

Design of the Thinkware U1000 Plus Dash Camera

The U1000 Plus is a low-profile camera that mounts at the top of your windshield. Rather than a square or round body, the bulk of the camera sits flat against the glass. This design leaves a lot of clearance for the sun visor and rearview mirror.

The main camera can be tilted up or down to ensure the system works with windshields with varying rakes. The camera body is 4.33 inches tall, 2.55 inches wide and 1.18 inches thick. On the left side of the chassis are power connections, a port for an external radar sensor and the optional rear camera. The rear camera uses a USB connection, so you shouldn’t have issues with RF interference. Thinkware includes a hardwire installation kit with the camera. You can upgrade to the OBD-II power cable if you don’t want any of the wiring in your vehicle modified. This is a wise investment for leased vehicles.

Thinkware U1000 Plus
The right side of the chassis has the Micro SD memory card slot, the reset button and the microphone.

Once installed, the camera body has the manual recording button in the center and the Power, Wi-Fi and voice recording buttons in the upper left corner. LEDs across the top indicate when the unit is on, when Wi-Fi is enabled, and when the GPS receiver has locked on enough satellites to pinpoint your location.

Thinkware U1000 Plus

Thinkware Dash Camera Specifications

This camera features a Sony IMX515 STARVIS-Series image sensor that can record at up to 3840 x 2160 pixels at 30 frames per second. It can also be configured to record in 2K mode at 2560 x 1440 pixels at 60 frames per second. The viewing angle is rated at 135.6 degrees, offering a good balance of detail and field of vision.

The rear camera features a Full HD-quality image sensor that records 1920×1080 pixels at 30 frames per second. Both the front and rear cameras have a High Dynamic Range (HDR) mode that compresses the light and dark parts of the image to make objects in shadows, or that might be washed out by a bright light source more visible. Low-light performance is further enhanced with Thinkware’s Super Night Vision 3.0. This processing reduces noise when light levels are low to keep videos clear and sharp.

Thinkware U1000 Plus
The Wide Dynamic Range mode compresses bright areas and brightens dark parts of the image to make everything more visible.

Video files are stored using the HEVC format H.265 to maximize file storage. With the 64GB card included, the system can store up to 151 minutes of video in a dual-camera solution. You can increase the size of the memory card to 512 GB for an incredible 1229 minutes of storage.

You can upgrade the U1000 Plus to a five-camera system using Thinkware’s optional multiplexer and three additional cameras. This is an ideal solution for taxi, limousine and rideshare applications.

Thinkware U1000 Plus
The U1000 Plus can be upgraded with the optional multiplexer module and additional cameras for better coverage.

Parking Mode Protection

The Thinkware U1000 Plus includes several parking mode options. In energy-saving mode, the camera only stores video when the onboard accelerometer detects impacts. Motion and Impact mode allows the camera to watch for vehicles or people entering the field of vision along with impact sensing. The camera stores a 20-second video that starts 10 seconds before the event trigger. Time Lapse mode records constantly at two frames per second.

The U1000 Plus can be upgraded with Thinkware’s optional radar module. Rather than monitoring the area in front of the vehicle using the image sensor, the radar sensor detects someone or something approaching. This dramatically reduces current consumption, so there is less draw on the vehicle battery.

Thinkware U1000 Plus
The optional radar sensors can dramatically reduce current draw when using parking mode.

Wi-Fi Connectivity

You can use the Thinkware Dashcam Link app on your Android smartphone, iPhone, or tablet to view video files stored on the system. Once connected, your installer can adjust the system settings and fine-tune the viewing angle to ensure maximum coverage.

The Thinkware Connected app gives the U1000 Plus Cloud-based connectivity. If you have a mobile hotspot, or the dashcam can connect to Wi-Fi at your home, you can view what the camera sees on your phone. You’ll also get impact notifications when parked. The vehicle operator can send an emergency message to the registered contact by pressing the REC button on the chassis for three seconds. Parents or business owners can review the vehicle’s operational history to review use and driving behavior.

Advanced Driver Assistance Systems

Modern video processing technology allows the U1000 Plus to warn the operating. These Advanced Driver Assistance Systems (ADAS) include Front Vehicle Departure Warnings (FVDW), Forward Collision Warnings (FCWS) and Lane Departure Warnings (LDWS). Notifications about approaching a vehicle too quickly or crossing the lines on the side of the road can help prevent serious accidents.

Thinkware U1000 Plus
ADAS features like Forward Collision Warning integrated with the Thinkware U1000 Plus can help prevent serious accidents.

If you are shopping for a premium dash camera with a high-resolution image sensor, the Thinkware U1000 Plus should be on your shortlist. This solution can record video in 4K resolution and is available with a secondary camera to capture what happens behind your vehicle. Let’s take a close look.

Upgrade Your Vehicle with a Thinkware Dash Camera

We all know that having a dash camera is the best way to protect yourself from fraud and false accusations. It’s also an ideal solution for capturing those “I can’t believe that just happened” moments. When upgrading your vehicle, drop by a local authorized Thinkware retailer and ask about the U1000 Plus system. They can provide you with a quote that includes expert installation.

You can learn more about Thinkware products like the U1000 Plus by visiting their website. Their dealer locator makes it easy to find a retailer near you to help design and install a premium dash camera system.

This article is written and produced by the team at www.BestCarAudio.com. Reproduction or use of any kind is prohibited without the express written permission of 1sixty8 media.

Filed Under: RESOURCE LIBRARY, ARTICLES, Driver Safety, PRODUCTS Tagged With: Thinkware

Product Spotlight: Rockford Fosgate PP4-NT

Rockford Fosgate PP4-NT

Not long ago, we took a look at the impressive PPS4-10 10-inch Punch Pro midrange drivers from Rockford Fosgate. While they are great for keeping up with a trunk full of subwoofers, what works in terms of reproducing those high frequencies? This spotlight focuses on the Rockford Fosgate PP4-NT Punch Pro tweeter. Let’s check it out!

Rockford Fosgate PP4-NT Specifications

The PP4-NT is a one-inch diameter aluminum dome horn tweeter designed for SPL systems. The tweeter is rated to handle 50 watts of power continuously and 100 watts maximum. The driver has a nominal impedance of four ohms and has an incredible efficiency rating of 105 dB SPL when powered with one watt and measured at a distance of one meter.

The Rockford Fosgate PP4-NT tweeters are sold individually. So, if you need a pair, then you have to buy two of them.

Rockford Fosgate PP4-NT
The raw PP4-NT Tweeter (left), with the mounting flange (center) and with the through-panel clamp (right).

Punch Pro Tweeter Features

As mentioned, the PP4-NT is based around an aluminum diaphragm and is powered by a compact neodymium magnet. The voice coil is formed from high-temperature Nomex to help ensure reliability. This is all housed in an aluminum chassis that improves heat extraction from the voice coil assembly. To increase efficiency, the tweeter uses a horn design with a pointed phase plug.

Electrical connections are handled by a pair of spring-loaded chrome terminals on the bottom of the housing. The terminals are designed to allow wires to be inserted from underneath the tweeter, preventing wires from protruding and increasing the overall size.

Rockford Fosgate PP4-NT
Electrical connections are made using a pair of spring-loaded terminals on the bottom cap.

SPL Tweeter Mounting Options

Rockford Fosgate includes two mounting solutions for the PP4-NT. If space is at a premium, then the compact outer trim ring will screw down into the body and clamp over materials up to 0.35 inches thick. Your installation technician will need access to the back of the mounting location to complete this installation.

Alternatively, the tweeter can be flush mounted through a 2.52-inch hole using the provided removable mounting flange.

With the compact mounting ring, the tweeter body is 2.52 inches in diameter and the ring is 2.09 inches across. The surface mounting ring measures 3.64 inches across.

Rockford Fosgate PP4-NT
The included mounting flange allows the tweeter to be surface-mounted.
Rockford Fosgate PP4-NT
Mounting dimensions for the two installation options.

Crossover Options

The PP4-NT includes a built-in 6dB/octave 4kHz crossover. This is equivalent to using a four-microfarad capacitor wired in series with the voice coil. You can also use the tweeter with the PP4-X Punch Pro passive crossovers. The crossovers are designed to apply a 3 kHz low-pass filter to whatever four-ohm Punch Pro midrange you choose. They also add 0, -3 and -6 dB output attenuation options for the tweeters. If you don’t have a DSP and amplifier channels dedicated to the tweeters, then the PPS-X crossovers are a wise investment.

Rockford Fosgate PP4-NT
The optional Punch Pro passive crossover networks add output attenuation options to the PP4-NT installation.

Louder Than Loud for Music Fanatics

If you are working on building a car audio system designed to play music at rock concert levels, visit a local authorized Rockford Fosgate retailer and ask about the PP4-NT tweeters and the rest of the Punch Pro line.

You can find a local authorized Rockford Fosgate retailer at their Dealer Locator. Be sure to follow Rockford Fosgate on Facebook, Instagram and YouTube to learn about their new products and the amazing events they attend each year.

This article is written and produced by the team at www.BestCarAudio.com. Reproduction or use of any kind is prohibited without the express written permission of 1sixty8 media.

Filed Under: ARTICLES, Car Audio, PRODUCTS, RESOURCE LIBRARY Tagged With: Rockford Fosgate

Control Your Vehicle Remotely with Your Smartphone

Smartphone Remote

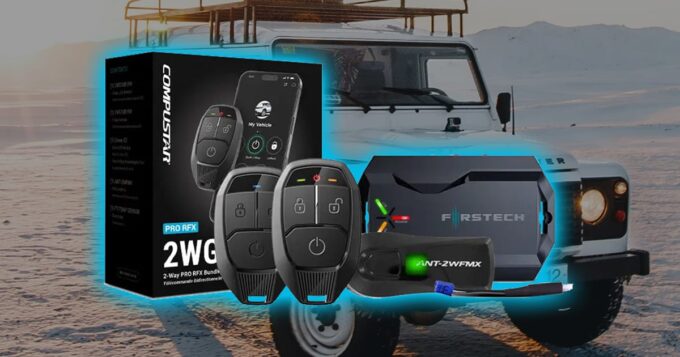
Using a smartphone app to control your remote start or car alarm system is nothing new. Technologies like Drone from Firstech have been around for several years. As with any technology, manufacturers are always working on new features that improve existing platforms’ usefulness or are developing alternative solutions. In this article, the BestCarAudio.com team will look at how smartphone remote control options have advanced over the years.

Lightning-Fast Response Times

One of the most significant changes to systems such as Drone has been the implementation of LTE connectivity. LTE, which unceremoniously stands for Long-Term Evolution, offers a boost in data transmission rate over the traditional 3G communication standard that’s been around since 2003. Not only is the maximum speed much faster, but the latency or delay time is reduced.

What does this improvement in speed mean to someone with a Drone X1-LTE or X1-MAX interface in their vehicle? Commands from your phone are relayed to your vehicle four to ten times faster than with 3G systems. Unlocking your car with Drone is just about as fast as using a one-button RF remote. The speed is absolutely amazing, considering that the message from your phone has to travel through the internet to the Drone servers at Amazon Web Services (AWS), be authenticated, then forwarded to the cellular network for transmission to your vehicle.

More Than Just a Remote Control

Drone does a lot more than just let your phone mimic the buttons on a wireless remote. The system lets you monitor battery voltage, so you’ll know if there’s something wrong before you get to your vehicle and are stranded with a dead battery. Likewise, you can check the temperature inside your vehicle from the app to let you decide if you need to remote start the vehicle five minutes before leaving work, or just a minute.

Smartphone Remote
Knowing whether the interior of your car or truck is hot or cold makes it easy to decide when to use your remote start system.

If you have opted for one of the GPS-activated Premium or Ultimate packages, the system will provide maintenance reminders based on the distance you’ve driven. These can help you plan when you need an oil change based on actual vehicle use. If you are managing a fleet of vehicles, this is a godsend!

The system can also communicate with the engine management system to monitor diagnostic trouble codes. If the Check Engine light pops up, you’ll get a message on your phone. In some cases, these warnings are related to something simple like a loose gas cap. In some cases, these warnings indicate that something is wrong with the vehicle and that it needs immediate service. Again, this might be information that your staff doesn’t always remember to share with you as a fleet owner.

Smartphone Remote
Real-time tracking of vehicle use lets you know when it’s time for regular maintenance.

Bluetooth Vehicle Control Options

If you want effectively unlimited range, then a cellular-based smartphone remote control option is the only choice. With that said, what if your phone could connect to your vehicle directly using technology like Bluetooth? A product called CarLink (in the US) or SmartControl (in Canada) may be exactly what you are looking for, and more!

This remote control package includes a one-button remotes that provide two-way communication with a range of up to 1.5 miles or 2.4 kilometers. The antenna and remotes work with most name-brand remote starter and security systems on the market, including Compustar, Viper, iDatastart, CodeAlarm, Omega, Pursuit and many more.

Smartphone Remote
The CarLink ASCLBTLR system includes a rechargeable one-button remote and an antenna, both of which include a Bluetooth transceiver to work with your smartphone.

Here’s where your phone comes into play. With the CarLink/SmartControl app installed on your phone, you have the option of connecting directly to the antenna in your vehicle using Bluetooth. You can lock, unlock, arm/disarm or remote start your vehicle with a tap on the screen. You can also monitor battery voltage and remaining remote start runtime, and if your starter system includes a thermistor, you can see the temperature in the vehicle. Pretty neat, isn’t it?

Well, wait a second, it gets better. The remotes have Bluetooth transceivers built-in. This connectivity option means that you can connect your smartphone to the remote, then use the radio-frequency (RF) communication to talk to your vehicle. Now, your phone has more than a mile of range available, so you can start your car or check to make sure the doors are locked from inside an apartment or building. Best of all, because it’s all RF-based, there are no fees involved to use the service.

Smartphone Remote
The SmartControl RFK-6000 remote kit includes a Bluetooth-equipped windshield antenna and the unique ultra-thin TXBLCC rechargeable remote control with Bluetooth.

Update Your Car Starter or Security System with Smartphone Control

Whether you need unlimited range from a cellular-based smartphone control system or want to be able to use an RF remote with an app, many technologies are available. Drop by your local mobile enhancement retailer today to find out how you can make it easier than ever to start your car or truck using an app on your Android or Apple phone.

This article is written and produced by the team at www.BestCarAudio.com. Reproduction or use of any kind is prohibited without the express written permission of 1sixty8 media.

Filed Under: RESOURCE LIBRARY, ARTICLES, Remote Car Starters

Product Spotlight: Rockford Fosgate PPS4-10

Rockford Fosgate PPS4-10

What do you do when you need midrange speakers capable of keeping up with a pair of 15-inch Power Series subwoofers in the back of your SUV? The answer is the Rockford Fosgate PPS4-10 Punch Pro 10-inch speaker. These beasts boast a subwoofer-sized voice coil and handle 350 watts of power to ensure every word remains clear and audible over all that bass. Let’s dive into the details!

Rockford Fosgate Punch Pro PPS4-10 Features

The PPS4-10 is a high-efficiency midrange speaker with a massive 10-inch size. Sold individually, these speakers achieve an impressive efficiency of 96 dB SPL with just one watt of power measured at one meter. Each speaker includes a sturdy mesh grille for added protection in indoor installations.

Built on a stamped steel chassis, the PPS4-10 features a large 8.25 by 1-inch ceramic magnet. The basket uses the StampCast design, which provides the structural rigidity and provides the sleek look of a cast-aluminum design. Additionally, the mounting flange includes four slotted holes, allowing precise alignment during installation. Despite its large diameter, the speaker requires only 4.06 inches of mounting depth.

Rockford Fosgate PPS4-10
The PPS4-10 features a massive 8.25 by 1-inch magnet to maximize efficiency.

Punch Pro Midrange Soft Parts

The speaker’s cone is made from fiber-reinforced pressed paper, keeping the cone mass low to help the speaker’s efficiency. A treated textile W-shaped surround connects the cone to the basket, while a high-temperature 2.58-inch aluminum voice coil sits at the core, topped by a machined aluminum phase plug. Beneath the cone, a poly-cotton spider delivers excellent control and durability.

For electrical connections, the PPS4-10 uses spring-loaded terminals mounted on the basket. Fatigue-resistant tinsel leads, sewn to the spider, prevent noise at high power levels.

Rockford Fosgate PPS3-10
The lightweight cone is made from pressed paper to deliver excellent efficiency.

PPS4-10 Specifications and Application

The PPS4-10 has a resonant frequency (Fs) of 53.5 Hz, an equivalent compliance (Vas) of 1.24 cubic feet, and a total Q (Qts) of 0.26. With a maximum one-way excursion (Xmax) of 4.6 mm, it offers impressive performance for a midrange speaker.

To explore potential applications, we conducted simulations based on an estimated effective cone area for the PPS4-10. In infinite baffle setups, the mids perform with a -3 dB frequency of around 200 Hz.

Each speaker requires a minimum of 0.2 cubic feet of airspace for sealed enclosures. This setup delivers a -3 dB frequency just above 160 Hz. To bridge the frequency gap between these mids and a subwoofer, consider a woofer like the Prime R2 or Punch P1, which can comfortably play up to 150 Hz.

If you need the mids to handle lower frequencies, your installer can build a vented enclosure with a net volume of 0.25 cubic feet with a vent tuning frequency of 80 Hz. This configuration extends the output to just under 100 Hz. Unless you run massive, heavy subwoofers, you should be able to use a high-pass crossover at 100 Hz and still have the system sound dynamic and punchy.

Rockford Fosgate PPS4-10
Predicted frequency response of the PPS4-10 in 0.2 cubic feet sealed (red) and 0.25 cubic feet ported (red).

Rock Out with the Rockford Fosgate Punch Pro Mids!

If you need midrange speakers to keep up with a wall of subwoofers, the Punch Pro series, including the PPS4-10, is an excellent choice. The Punch Pro lineup also features 6.5-inch and 8-inch mids to accommodate different installation spaces. All three sizes are available in four-ohm configurations.

You can find a dealer near you using the locator tool on their website. Be sure to follow our friends from Tempe on Facebook, Instagram and YouTube to keep up with new product releases and the events they attend.

This article is written and produced by the team at www.BestCarAudio.com. Reproduction or use of any kind is prohibited without the express written permission of 1sixty8 media.

Filed Under: RESOURCE LIBRARY, ARTICLES, Car Audio, PRODUCTS Tagged With: Rockford Fosgate

Proper Headlight Aiming Makes Driving Safer at Night

Headlight Aiming

As fall approaches, we find the sun setting hours earlier than it did in the summer. With this increase in darkness, we need to rely on the forward lighting systems in our cars and trucks to keep us safe. In this article, we are going to look at the importance of making sure your headlights are aimed properly. Proper horizontal and vertical adjustments will ensure that you can see far enough down the road to react to obstacles or avoid animals. Of equal importance, aiming your lights so that they aren’t blinding oncoming drivers is crucial to those drivers staying in their lane and not colliding with your vehicle. The science and process are simple, but they’re often overlooked.

Headlights Are an Important Safety System

In addition to your vehicle’s tires and braking system, your headlights are one of the most critical safety systems on your vehicle. If you can’t see far enough down the road when it’s dark, you won’t have time to react to objects in your path. At 60 miles per hour, you and your vehicle are covering 88 feet per second. Given than most humans have a reaction time of about one half of a second, and it takes another half of a second to move your right foot from the gas pedal to the brake, you’ve already traveled 80 feet. Now, consider that the average vehicle requires between 120 and 145 feet to stop from 60 mph, and you’ve likely traveled at least 200 feet.

Most low-beam lighting systems provide useful output to a range of 100 feet. Some of the better HID and LED systems are bright enough to illuminate 150 feet in low-beam mode. Driving at a speed where you don’t have enough time to stop because of your lighting system’s limits is called overdriving your headlights.

Headlight Aiming
Even factory-installed lighting systems need to be checked regularly to ensure that they’re providing adequate performance.

How Can You Upgrade Your Lighting System?

Upgrading the lighting on your vehicle involves two factors. First, you need a light source that is bright enough to illuminate the road at a distance that gives you enough time to react safely. Next, your lights need to be aimed perfectly to make use of their output capabilities. If your lights are aimed down at an angle of five degrees, then the area in front of your vehicle might be bright, but you’ll never see more than 100 feet down the road. Conversely, having your lights aimed horizontally might provide good long-distance vision, but this can lead to your lights blinding oncoming drivers. A driver approaching you who cannot see the edges of the road or your vehicle is as dangerous as you not seeing where you are going. Proper headlight aiming is paramount!

Headlight Aiming
High-performance LED bulb upgrades like the Intense Series from ODX can provide three times as much light output as a conventional Halogen headlight bulb.

When Should I Have My Headlight Aim Checked?

The first sign that your lighting system needs adjustment would be that oncoming drivers are flashing their high beams at you as they approach. Blinding an oncoming driver is extremely dangerous. Likewise, if your lights don’t light up the rear bumper of a vehicle a car’s length in front of you, they need adjustment.

If you have made any modifications to your vehicle, you should have your technician check the headlight alignment. Changes to tire diameter or suspension height, especially if you have installed a leveling kit or lowering springs, require that the lights be adjusted. If you have added weight to your vehicle in the form of a stereo upgrade with a subwoofer system, the additional mass in the rear of the vehicle may also necessitate a change in light aiming.

Let’s Talk About Headlight Aiming Angle

The farther your lights are above the road, the steeper they can be angled downwards while still allowing you to see approximately 150 feet in front of the vehicle. Many websites cite a specific angle that is deemed to be suitable for all applications. The reality is, the specific downward angle of the beam depends on their distance above the ground. If someone says two degrees is the right angle, but your lights are 18 inches off the ground, you’ll only have light for 43 feet in front of your car. If you have a truck with the lights 36 inches above the ground and set the lights to the same angle, you’ll have light for 86 feet. Likewise, the suggestion that a fixed amount of drop is suitable also fails to compensate for differences in bulb height off the ground.

Have Your Headlights Adjusted for Maximum Safety

When it’s time to have your headlights adjusted, we’ve developed a simple process that makes the adjustment reliable and efficient. Before the technician begins any work, your vehicle must be on level ground with the tires inflated properly. Ideally, whatever combination of driver and passenger(s) is most common to the vehicle’s operation should be inside. Likewise, the fuel tank should be half full. If you have a truck or SUV and carry tools or supplies, have them in the vehicle. You’ll want the ride height to be typical before the measurements begin.

Step 1 – Measure the Cut-off Height

The first step is to establish the level at which the light is produced at the bulb or lens. With the vehicle appropriately loaded (as outlined above), measure from the ground to the top of the light cut-off pattern as close as possible to the headlight lens. Note this measurement for each side of the vehicle, as it may not sit perfectly parallel to the ground.

This process requires that the lights are already aimed relatively accurately. If you’ve had new projectors or bulbs installed, your tech will need to make sure the light pattern is relatively close to accurate. If a light is pointing at the sky, the remainder of the measurements will be inaccurate. They should be within a few degrees of horizontal.

Headlight Aiming
This photo shows a typical beam pattern for a modern headlight system.

Step 2 – Measure the Cut-off at 25 feet

The next step is to measure the height of that headlight cut-off at a distance of 25 feet in front of the lights. Use the same reference point used for the first measurement to set this distance. For example, if the tech measured the at-vehicle height 4 inches in front of the headlight lens, he or she should measure out 24 feet and 4 inches for this second measurement.

Step 3 – Use the Chart

Using the chart below, your technician can determine how high the cut-off should be above the ground for the distance you want to illuminate. If you drive exclusively in the city, then the 125-foot distance will work well. If you drive in the country, the extra distance afforded by using the 175-foot measurement is a better choice.

Headlight Aiming
Using this chart eliminates the need for any calculations and allows your technician to aim your headlights for maximum performance and safety.

Step 4 – Adjust the Lights

Most modern vehicles have simple adjustments for vertical and horizontal alignment built into the light assembly. In most cases, a long screwdriver is all that’s required to raise or lower the light aiming to achieve the correct cut-off height.

Headlight Aiming
With a quick look at a resource like ProDemand, your technician can quickly and easily determine the headlight adjustments for your vehicle.

The next step is for the technician to adjust the lights so that the drop at the 25-foot mark matches the chart. As long as both lights are close to each other in height, your technician can fine-tune the adjustment by lowering whichever light is higher so that the top of the cut-off is in line with the output pattern of the other light.

Horizontal Headlight Adjustment

If work has been done to the vehicle or the light assemblies, then your tech may need to adjust the horizontal adjustment to make sure both lights are aimed forward and that the hot spots from each light are spaced apart by the same distance as the bulbs in the vehicle. It’s crucial to make sure the lights are pointed straight ahead and not off to the left or right.

Drive Safely with Proper Lighting

There are a multitude of options to upgrade the lights in your car or truck. High-performance halogen, LED and HID bulbs can improve the capabilities of mediocre factory lighting systems. Once you’ve had these light upgrades aimed properly, you’ll be able to see farther and drive more safely. Your local specialty mobile enhancement retailer can likely help you with a complete lighting solution that includes proper pattern alignment.

This article is written and produced by the team at www.BestCarAudio.com. Reproduction or use of any kind is prohibited without the express written permission of 1sixty8 media.

Filed Under: RESOURCE LIBRARY, ARTICLES, Lighting

  • « Previous Page
  • 1
  • 2
  • 3
  • 4
  • 5
  • 6
  • …
  • 19
  • Next Page »

Recent Articles

A motorcycle audio amplifier

What to Look for in a Motorcycle Amplifier Upgrade

June 22, 2025 

It should come as no surprise that it takes a moderate amount of amplifier power to reproduce music on a motorcycle that’s audible when on the freeway. So aside from great … [Read More...]

A purple car with tinted windows

Four Reasons to Have Your Car or Truck Windows Tinted

June 8, 2025 

A person might choose to have the windows on their car or truck tinted for a variety of reasons. No matter why you’re interested in window tint, the team here at BestCarAudio.com … [Read More...]

DroneMobile XC Connected Dashcam Security System

Product Spotlight: DroneMobile XC Connected Dashcam Security System

May 26, 2025 

Thieves frequently target vehicles from Hyundai, Kia, Toyota, Lexus, RAM, Chevrolet, and Honda. These vehicles are often stolen for their parts or exported overseas. … [Read More...]

A man installing car window tint

Five Questions to Ask When Shopping for Automotive Window Tint

May 25, 2025 

Shopping for high-quality window tint for your car or truck isn’t much different from shopping for any other automotive accessory upgrade. There are high-performance tint films … [Read More...]

Compustar 2WG17 Remote Kit

Product Spotlight: Compustar 2WG17 Remote Kit

May 19, 2025 

Compustar was one of the first brands to allow consumers to choose a remote control package to accompany their remote start controller. Previously, we looked at flagship-level … [Read More...]

Subscribe!

Enter your email address to subscribe to our website and receive notifications of new posts by email.

Join 1 other subscriber

Testimonials

Our customers can trust us with a job done right.

If you want to upgrade your vehicle with window tint, a new car audio system or a remote car starter, we invite you to visit the team here at Extreme Car Audio in Manteca.

Check back here for more testimonials soon!

Whether it’s a new radio, a remote car starter or new driving lights, we take the time to ensure that every connection is secure and the equipment is mounted safely. We do the job right the first time, every time.

Window Tinting Experts!

We take a great deal of pride in our window tint solutions. Call or stop by today to see what options we can offer to take your vehicle to the next level.

Subscribe to Our Website

Enter your email address to subscribe to our website and receive notifications of new posts by email.

Location


Get Directions to Extreme Car Audio, INC

Address

Extreme Car Audio, INC

197 S Union RD, Manteca, CA 95337
209-665-4150

Connect With Us

  • Facebook
  • Instagram
  • Youtube

Services

  • Car Audio
  • Driver Safety
  • Marine Audio
  • Motorcycle Audio
  • Remote Starters
  • Vehicle Security
  • Window Tint

Hours

Monday, Tuesday, Wednesday, Thursday, Friday, Saturday8:30 am – 6:00 pm

We are Closed on Sunday

Copyright © 2025 Extreme Car Audio, INC · Privacy Policy · Website by 1sixty8 media · Log in


Loading Comments...